Search This Blog

Friday, October 3, 2014

Co-existing Doctrine 2 ORM with other database access methods.

This is useful if you are maintaiing legacy code that uses another ORM, but are adding new features with Doctrine 2.
A recent case I worked in was adding a 'free months' feature to an existing subscription purchasing system.
This post may also help you diagnose and resolve doctrine
 A new entity was found through the relationship...that was not configured to cascade persist operations
errors
The existing code was using ZendDb, and the application had the Doctrine 2 libraries, entity and repository classes created so it appeared to make sense to add the new features as business objects can call from from the existing code.
A problem arose when the existing code - having modified the transaction in question and saved the details to the database, but the changes were not reflected in the Doctrine entities, even though I was 'retrieving' them as required.
If course the entities were not being reread from the database but from the cache.
So I added the code to detach my entities:

/**
 * @var $oEm \Doctrine\ORM\EntityManager
 *
 */
$oEm = \Europa\ServiceLocator::getInstance()->get('doctrine2em');
$oEm->detach($oORMTransaction);
$oORMTransaction = null;

This worked well, when I next retrieved the entities I got correctly updated values.

However later in the code I called a new method:
$oSubscriptionTransRepo->spendFreeMonths($oTransaction);

In this any available free months are spent (i.e. decremented).
When this ran I got the error:
Message: A new entity was found through the relationship 
Message: A new entity was found through the relationship 'Viomedia\ORM\Entity\SubscriptionTransItem#CartTrans' that was not configured to cascade persist operations for entity: Viomedia\ORM\Entity\CartTrans@0000000055ca15a6000000001600931c. To solve this issue: Either explicitly call EntityManager#persist() on this unknown entity or configure cascade persist  this association in the mapping for example @ManyToOne(..,cascade={"persist"}). If you cannot find out which entity causes the problem implement 'Viomedia\ORM\Entity\CartTrans#__toString()' to get a clue.
File: /var/webserver/viomedia/vendor/doctrine/orm/lib/Doctrine/ORM/ORMInvalidArgumentException.php:91
As detailed in stackExchange: especially the answer by Jasper N. Brouwer - paraphrasing for the code above: 
The exception says: A new entity was found through the relationship 'Viomedia\ORM\Entity\SubscriptionTransItem#CartTrans'.  So it's the value of $cartTrans in SubscriptionTransItem. I guess that would be a SubscriptionTransItem entity 
Like I said, the problem is probably not that the SubscriptionTransItem hasn't been persisted, but that it currently isn't managed by the entity-manager.  
What the detach did above was to leave the child SubscriptionTransItem entities in a un-managed state.
I fixed this (for now) by changing the above code to:
/**
 * @var $oEm \Doctrine\ORM\EntityManager
 *
 */
$oEm = \Europa\ServiceLocator::getInstance()->get('doctrine2em');
foreach(\Viomedia\ORM\Repository\SubscriptionTransItem::getInstance()->getSubscriptionTransItems($oORMTransaction) as $oTransItem)
 {
    $oEm->detach($oTransItem);
}
$oEm->detach($oORMTransaction);
$oORMTransaction = null;
The real solution however is to avoid mixing more than 1 entity manager in the same code.

Wednesday, May 29, 2013

SugarCRM relationship names.

Programming with beans, in Sugar, you would use code like this to create a note and then attach it to a related entity - in this case an 'Invoice'.

$note = new Note();
$note->modified_user_id = $current_user->id;
$note->name='invoiced on ' . date('d/m/Y');
$note->description='next due: '.$bean->next_due.'; rate: '.$bean->rate;
$note->save();

$rel_name = 'inv_invoices_notes_1';
        $bean->load_relationship($rel_name);
$bean->$rel_name->add($note->id, array());

$bean->save();  
However you need to know the name of the relationship - in this case inv_invoices_notes_1, .
This relationship was created in Studio between 2 already existing modules.
You can get the relationship name from a php file called vardefs.ext.php - in custom/module/<module-name>/Ext/Vardefs/:

// created: 2013-04-18 06:00:38
$dictionary["INV_Invoices"]["fields"]["accounts_inv_invoices_1"] = array (
  'name' => 'accounts_inv_invoices_1',
  'type' => 'link',
  'relationship' => 'accounts_inv_invoices_1',
  'source' => 'non-db',
  'vname' => 'LBL_ACCOUNTS_INV_INVOICES_1_FROM_ACCOUNTS_TITLE',
  'id_name' => 'accounts_inv_invoices_1accounts_ida',
);


Thursday, May 16, 2013

MS CRM - Hide a form element based on the Users' Role

Often if testing a new element in CRM - for example an external link, you will only want it visible to certain users.
This may be the case even after that particular item is complete.
You can use javascript to do this, by querying for the user roles in Xrm.Page.context.getUserRoles():


function Form_onload()
{

    // check for test Role: 7e15636f-ab5f-e211-96b4-000c29f98cb8
    var testRoleId = '7e15636f-ab5f-e211-96b4-000c29f98cb8';
    var userRoles =Xrm.Page.context.getUserRoles();

    //test code  list user roles to console
    for (var i=0; i < userRoles.length; i++) {
        window.console &&  window.console.log(i + ' role:' + userRoles[i]);
    }

    var inTestRole =  userRoles.indexOf(testRoleId);
    if ( inTestRole < 0 ) {
        var navPriceListItem = document.getElementById('navLink{814d1cba-5412-2bc0-a7ae-46bc80384583}');
        navPriceListItem.style.display = 'none';
    }
}

Ideally you should be able to query the roles by name and also identify the form element better.


Friday, May 10, 2013

JavaScript dataAdd function

One of the few gifts to programming contributed by the BASIC language is the dateAdd function.
I have seen versions of it ported to Oracle PL/SQL, SQL Server TSQL, PHP and other languages.
Javascript is an obvious candidate for this.
Like many languages, Javascript has a date object and you can easily add a required number of days to it, (this is how date additions are handled in Oracle SQL).
However what you want is to be able to easily and reliably add different periods - weeks, months, years a date add function specifying the interval.
There are various examples - here, and here and even here, the problem with these is that they don't add months correctly.
If you add 1 month to the 31st of January - e.g.
var d = new Date ('31/01/2007');
d.dateAdd('m', 1);
The code suggested is:

 case "m":
      dTemp.setMonth(dTemp.getMonth() + iNum);
      break;


This is logical but as January has 31 days and February has (usually) 28, it appears the setMonth function increments the date by the length of the current month.
I had to implement an invoicing function, and accounts people tend to be very particular about their dates.
My suggestion for a month add algorithm is:

case "m": {        // month
    var dParts = { 'year' : this.getFullYear
                 , 'month': this.getMonth()
                 , 'day' : this.getDate() };
    dParts.month =+ p_Number;
    if (dParts.month > 11) {
   dParts.month =- 11;
   dParts.year++;
        this.setYear(dParts.year);
    }
    this.setMonth(dParts.month);
    break;
}

The logic handles wrapping around a year by extracting the month and year (also the day which I didn't think I needed).

This is better, but still not correct. When adding one month to 31st of January, we will get the 3rd of March. This is because the new day is 31st of February, which is then wraps over into March.
We need to know how many days are in the next month and adjust accordingly.


        case "m": {        // month
            var dParts = {'year' : this.getFullYear()
                          , 'month': this.getMonth()
                          , 'day' : this.getDate() };
            dParts.month = dParts.month + p_Number;
            if (dParts.month > 11) {
             dParts.month = dParts.month - 11;
             dParts.year++;
             this.setYear(dParts.year);
            }
            newMonthLength = daysInMonth(dParts.month, dParts.year);
            if ( dParts.day > newMonthLength) { this.setDate(newMonthLength); }
            this.setMonth(dParts.month);
            break;
                    }


I wrote 2 functions - one as an extension to the date class and a standalone function that just takes the month and year.


function daysInMonth_Extension() {
var year = this.getFullYear();
var month = this.getMonth();
if (month == 1) {
//february
if ( year % 500 == 0) { return(29); }
else if (year % 100 == 0) { return(28); }
else if (year % 4 == 0) { return(29); }
else { return(28) };
} else if (month == 3 || month == 5 || month == 8 || month == 10) { return(30); }
else {return(31); } 
}  /* daysInMonth_Extension */
Date.prototype.daysInMonth = daysInMonth_Extension;

function daysInMonth(month, year) {
if (month == 1) {
//february
if ( year % 500 == 0) { return(29); }
else if (year % 100 == 0) { return(28); }
else if (year % 4 == 0) { return(29); }
else { return(28) };
} else if (month == 3 || month == 5 || month == 8 || month == 10) { return(30); }
else {return(31); } 
}  /* daysInMonth */


This allows for February and September, April, June and November, remember month numbers start at 0. I should/will refactor this, but by now I was getting over it.


Incorporating code from the first link above you get the following - which I will put up on gitHub:


function daysInMonth_Extension() {
var year = this.getFullYear();
var month = this.getMonth();
if (month == 1) {
//february
if ( year % 500 == 0) { return(29); }
else if (year % 100 == 0) { return(28); }
else if (year % 4 == 0) { return(29); }
else { return(28) };
} else if (month == 3 || month == 5 || month == 8 || month == 10) { return(30); }
else {return(31); } 
}  /* daysInMonth_Extension */
Date.prototype.daysInMonth = daysInMonth_Extension;

function daysInMonth(month, year) {
if (month == 1) {
//february
if ( year % 500 == 0) { return(29); }
else if (year % 100 == 0) { return(28); }
else if (year % 4 == 0) { return(29); }
else { return(28) };
} else if (month == 3 || month == 5 || month == 8 || month == 10) { return(30); }
else {return(31); } 
}  /* daysInMonth */

function myDateAdd_Extension(p_Interval, p_Number){
    var thing = new String();
   
    //in the spirt of VB we'll make this function non-case sensitive
    //and convert the charcters for the coder.
    p_Interval = p_Interval.toLowerCase();
    
    if(isNaN(p_Number)){
    
        //Only accepts numbers 
        //throws an error so that the coder can see why he effed up    
        throw "The second parameter must be a number. \n You passed: " + p_Number;
        return false;
    }
    p_Number = new Number(p_Number);
    switch(p_Interval.toLowerCase()){
        case "yyyy": {// year
            this.setFullYear(this.getFullYear() + p_Number);
            break;
        }
        case "q": {        // quarter
            this.setMonth(this.getMonth() + (p_Number*3));
            break;
        }
        case "m": {        // month
            var dParts = { 'year' : this.getFullYear(), 'month': this.getMonth(), 'day' : this.getDate() };
            dParts.month = dParts.month + p_Number;
            if (dParts.month > 11) {
            dParts.month = dParts.month - 11;
            dParts.year++;
            this.setYear(dParts.year);
            }
            newMonthLength = daysInMonth(dParts.month, dParts.year);
            if ( dParts.day > newMonthLength) { dParts.day = newMonthLength; this.setDate(newMonthLength); }
            this.setMonth(dParts.month);
            break;
                    }
        case "y":        // day of year
        case "d":        // day
        case "w": {        // weekday
            this.setDate(this.getDate() + p_Number);
            break;
        }
        case "ww": {    // week of year
            this.setDate(this.getDate() + (p_Number*7));
            break;
        }
        case "h": {        // hour
            this.setHours(this.getHours() + p_Number);
            break;
        }
        case "n": {        // minute
            this.setMinutes(this.getMinutes() + p_Number);
            break;
        }
        case "s": {        // second
            this.setSeconds(this.getSeconds() + p_Number);
            break;
        }
        case "ms": {        // second
            this.setMilliseconds(this.getMilliseconds() + p_Number);
            break;
        }
        default: {
        
            //throws an error so that the coder can see why he effed up and
            //a list of elegible letters.
            throw    "The first parameter must be a string from this list: \n" +
                    "yyyy, q, m, y, d, w, ww, h, n, s, or ms. You passed: " + p_Interval;
            return false;
        }
    }
    return this;
}
Date.prototype.dateAdd = myDateAdd_Extension;

Note - I have tested this with days, years and months, for example:


            var dToday = new Date();    
            alert(dToday.dateAdd("m", 2));


However I haven't tested it with hours, minutes, seconds and milliseconds.

Subsequent Testing.

This may be better, but it still doesn't handle the rollover correctly.
If you add 14 months to a date, or addings day rolls over a month or year.

One easy change, change the if condition in month add code to a while statement:

        case "m": {        // month
            var dParts = { 'year' : this.getFullYear(), 'month': this.getMonth(), 'day' : this.getDate() };
            dParts.month = dParts.month + p_Number;
            while (dParts.month > 11) {
             dParts.month = dParts.month - 11;
             dParts.year++;
             this.setYear(dParts.year);
            }
            newMonthLength = daysInMonth(dParts.month, dParts.year);
            if ( dParts.day > newMonthLength) { dParts.day = newMonthLength; this.setDate(newMonthLength); }
            this.setMonth(dParts.month);


Adding days has the same problem, so I refactored the code adding addDays and addMonths functions:


        case "m": {        // month
            var dParts = { 'year' : this.getFullYear(), 'month': this.getMonth(), 'day' : this.getDate() };
            this.addMonths(dParts, p_Number);
        }
        case "d" : {
            var dParts = { 'year' : this.getFullYear(), 'month': this.getMonth(), 'day' : this.getDate() };
            this.addDays(dParts, p_Number);
        }


function myDateAdd_addMonths_Extension(dParts, p_Number){
            dParts.month = dParts.month + p_Number;
            while (dParts.month > 11) {
             dParts.month = dParts.month - 11;
             dParts.year++;
             this.setYear(dParts.year);
            }
            newMonthLength = daysInMonth(dParts.month, dParts.year);
            if ( dParts.day > newMonthLength) { dParts.day = newMonthLength; this.setDate(newMonthLength); }
            this.setMonth(dParts.month);
}


function myDateAdd_addDays_Extension(dParts, p_Number){
            dateParts.day += p_Number;
            monthLength = daysInMonth(dParts.month, dParts.year);
    while ($dateParts->d > $monthLength) {
dParts.month++;
dateParts.day -= monthLength;
if (dateParts.month > 11) {
             dParts.month = dParts.month - 11;
             dParts.year++;
         } }
               monthLength = daysInMonth(dParts.month, dParts.year);
    }

}


Date.prototype.addMonthsmyDateAdd_addMonths_Extension;
Date.prototype.addDaysmyDateAdd_addDays_Extension;


This shows how complicated date calculations are, more testing is need to verify this code.

Configuring a XenServer 6/FreeNAS 8.2.0 Environment

These 2 versions of software - XenServer 6 on a whitebox PC and FreeNAS on an old Dell Poweredge 860 present some interesting configuration issue.
My goal was to configure a test environment before making changes to a production system and verify:

  • Configuring an intial system - with the XenServer and Centos 5.8 guest to access the NAS.
  • The process of adding Network Adaptors to the XenServer.
  • Configuring a storage local area network for the XenServer(s) to access the NAS.
  • Moving the NAS from the management network (Network 0) to the storage network.
  • Ensuring the guest VMs are still operational and can access their data.

XenServer 6.0 Installation and VM Configuration.

This was a straightforward installation. the XenServer was given a fixed IP. Version 6.0 build 50762p was installed.
 Creation of the VMs - with Centos 5.8 required using the generic "Other install media" templates. Using either the Centos or RedHat EL templates caused various errors - either at install - no mass storage devices found, or after install and errors like:
 File "/usr/bin/pygrub", line 808, in ?, fs = fsimage.open(file, part_offs[0], bootfsoptions), IOError: [Errno 95] Operation not supported

Once the generic template was used the VM could be installed and created as expected.


FreeNas 8.6.2 Installation on Dell PowerEdge 860.

FreeNas has the requirement that the drive the OS is installed on cannot be used for sharing, the installer reccomends use of a flash drive for the OS.
To add an boot of a flash drive, you need to modify the BIOS configuration for the 860, specifically:
1) Change the USB Flash Drive Emulation Type to "Hard Disk"
2) Change the order of the Hard Disk drive Sequence to make sure the USB drive is first.
The blog post at SysAdmin Notes is very  helpful.
I enabled SATA drives - rather than the PERC controller so FreeNas could access the drives.
I then followed the Quick Start Guide

  • set admin and root account password.
  • configure the network interface, by default the system will boot using DHCP on the first interface.
  • enabled display of console messages in footer.
  • created a volume on the SATA drive  (/mnt/ada0).
  • created a zfs volume (ada01) with in the ada0 volume 
  • manually create a user account (as opposed to using LDAP or Active Directory).
  • perform ISCSI configuration (see below).

ISCSI Configuration.

I did these steps:
  • Enabled the iSCSI service - under services.
  • Created a iSCSI authorized access. If using the Microsoft iSCSI initiator, the CHAP password should be between 12 and 16 characters long I would make it 12 characters long.
  • Created device extent on ada01
  • Create an initiator - set of systems allowed to connect, as per the quick start - ALL addresses and connect to ALL intitiators.
  • Specify portal - IP address and port to be used for iSCSI connections.
  • Check the Target Global Configuration - set Enable LUC to on, and Controller Auth Method to None, ensure Controller IP Address and Controller Network are the defaults. This will let you dynamically add/remove targets without having to restart the iSCSI service.
  • Create a target. Specify the name, alias Portal Group ID, Initiator Group ID, Auth Method and Authentication Group number. I set the Auth Method to CHAP. For a new system where will only be one Portal Group, Initiator Group and Authentication group.
  • Associated the Target with an extent. Select the Target and Extents created above - for a new system there will be only one selection.


MS CRM Field, Entity Reference.

This post is a collection of example sql squeries and other information on the entities underlying Microsoft's CRM. The version in particular is 2011, however much would be relevant for previous versions (e.e. V4).

Notes Associated with an Entity

The notes - entitiy name is Annotations have an ObjectID field which maps to the ID field of the 'parent' record, for an esample with Cases (which have a database entity of 'Incidents'), the join query would be:


select i.ticketnumber , i.description, note.notetext
from dbo.Incident  i
inner join dbo.Annotation note on i.IncidentId = note.ObjectId
where i.TicketNumber = 'JOB-24944-P8R3'
order by note.CreatedOn desc


Monday, April 22, 2013

Murky Waters - When Xenserver pools go bad.

Our XenServer (version 6.0) pool went bad. The word 'bad' - while not precise is the best way to describe it.
The planned configuration was:
  • 3 servers, each with 3 nics - runing XenServer v6.0
  • 2 iSCSI shared storage servers
  • 2 of the NICS bonded providing the management interface and added to each guest (VM) system.
  • 1 if the NIC for a dedicated storage network.
  • A dedicated storage network (addresses 192.168.40.x)
We had removed a server from the pool to upgrade the hardware (specifically to swap the hard drive for a 60Gb SSD drive).

The suggested procedure is to remove the server from the pool, upgrade the hardware, reinstall XenServer and then add it back to the pool.
We then reinstalled exactly the same version of Xenserver. When it started, it could see the 3 network intefaces.

When we added it back to the pool the new server couldn't see all of the networks.
Either the primary interface wasn't working reliably after a reboot, or the storage interface was not available.
On other attempts the primary interface would connect ok, but the 3rd storage interface would not.
We tried various combinations of first bonding the first 2 NICs before adding it to the pool, or adding it without any configuration.

I tested this process in a test system mentioned below (with 2 servers and 1 storage array) and never had any problems removing and adding back a server to the pool.
This was annoying as nothing else was changed (particularly with the network interfaces), just a new hard disk and a fresh install of XenServer.

After much research the decision was made to recreate the XenServer pool.
To summarise this involves:
  • backing up the VM metadata.
  • though the VM data on the storage array should be unaffected, ensure it is all is backed up.
  • for each server - remove it from the pool, install XenServer
  • create a new pool, and
  • restore the storage repositories and VM metadata.
This post details this procedure.

1. Preparation.

The pool was running, but in a degraded state - with 2 of the 3 servers operational  As this is an 'elective' procedure we were able to carefully plan, and in particular the procedure was practised on a test system.
The test system had 2 servers, 1 storage array, each server having 2 NICs; supporting had 3 VMs (Centos systems each with 8Gb of storage).
It was set up much as per this post, there wasn't much difference between v6.0 and v6.1. 

1.1 Testing.

The testing went as expected with one problem.

When we attempted to restore the virtual machine metadata for all of the servers using the console (xsconsole) Restore Virtual Machine Metadata command, 1 of the 3 VMs would not restore.
In hindsight I believe this VM had a drive attached to local storage on one of the servers.

What I decided to do is to save the metadata for the VMs individually using cli vm-export command in addition to the xsconsole command that backs up the metadata to disk on the storage repository.
The vm export command:

xe vm-export filename=vm_testserv2 uuid=ac7fc085-aa66-826d-5a69-599c5af20118 metadata=true

This prove to be invaluable later.

As part of the testing we upgraded the test pool from v6.0 to v6.1 (skipping v6.0.2) - the same version of Xenserver as the live pool. I wanted to be sure that there wouldn't be any problem accessing the storage repositories and the VM metadata backups and restarting the virtual machines themselves.

1.2 Documentation.

We checked and documented the following:
  • VM storage configuration.
  • VM (in this case Centos) kernel levels, Centos versions older than 5.4 can have problems with XenServer versiosn 6.02 and 6.1
  • Ejected any mounted virtual machine iso images.
  • Storage repository configuration - ip addresses, names and connection details.
  • Storage repository configuration - as screenshots from XenCenter, if under stress later a pictorial representation later can be helpful. We had 7 virtual machines, so taking the screenshots was manageable.
  • Saved lists from xen command line utilities, this included: xe sr-list; xe vm-list
  • Backup (dump) the pool ( pool-dump-database)  a metadata backup
  • Run a server status report and upload it to https://taas.citrix.com/ - Citrix Autosupport
Example Server disk screenshot.


One thing we didn't record specifically was ip addresses for the VMs, during the recovery process we did need this information. We retrieved it from other records.

2. The Process.

The following steps were done:
  1. Check no disks are on any of the local storage arrays. Sometimes templates - if created when the servers were first built can remain on local storage.
  2. Recheck and eject any mounted VM CD drives (as mentioned above).
  3. Do another backup of the virtual machines to a storage repository, also backup each vm individually:
    xe vm-export filename=vm_custweb uuid=ac7fc085-aa66-826d-5a69-599c5af20118 metadata=true
  4. Remove one server from the pool (or in our case the newly installed server that we couldn't rejoin to the pool).
  5. Install Xenserver 6.1, give it the same networking details (ip address, gateway, dns settings).
  6. On the old servers in the running pool, stop all virtual machines and detach - disconnect) from all of the shared storage repositories. For now we left them running.
  7. On the new server configure the networking (note however I didn't create the bonded network interface at this point).
  8. On the new server, connect to the storage repositories.
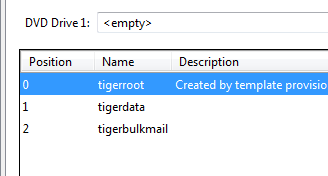
  9. Restore the virtual machines - (xs console, see screenshot below)
  10. Start one of the VMs.
  11. Then shutdown the old Xenservers, install Xenserver 6.1 and add them to the new pool.
VM Metadata restore


3. Problems.

VM Metadata Restoration.

Of our 7 virtual machines, one would not restore. It was known to not have any local storage. Apart from the fact it was one of the earlier (oldest) systems it didn't have any differences from the other VMs.
In this case it was able to be easily restore from the vm metadata export.

xe vm-import filename=vm_custweb metadata=true

This restore was able to work without any problem.

VM Networking.

One mistake we did do was to not fully reconfigure the networking before doing the VM metadata restore.
When we restored the VMs, they were not attached to a network because I hadn't recreated the bonded interface they were expecting.

I tried the configuration as it was with a test server - when it started the Centos system didn't have any network interfaces, later even after I had recreated the bonded interface, the other systems also didn't have any network interfaces. If I had configured it before doing the metadata restore I believe the restore would have been complete.

Our test system only had 2 NICs - the primary interface for the VMs was not bonded. If it had we would have picked up this problem in testing.

What I had to do - after configuring the networking, is to check each virtual machine had a network interface, and when the guest OS had started, reconfigure the networking - configure the IP address/netmask and default gateway. The dns configuration - not being tied to a particular interface was still in place.

This was manageable for 7 VMs of which only 1 had more than one interface. For a larger number I would have dropped them and re-restored them. Reconfiguring a larger number of VMs manually would have been error prone.


Network Configuration

Unreable Guest Server Attached Disk.

This was another error that wasn't anticipated and doesn't have a known cause.

One of the VMs when starting was unable to mount a partition. An fsck run from the single user command prompt also failed.

We edited the /etc/fstab file and the system started without the drive.
[ To edit the fstab in this situation, you need to remount the root partition re-write, i.e. from single user mode
 # mount -o remount,rw /dev/sda1 /  ]

We did have a copy of the data but I investigated first.
The virtual machine restore of the metadata did include the drive however a listing from fdisk showed:

[root@webtest ~]# fdisk -l
.... 
Disk /dev/xvdc: 42.9 GB, 42949672960 bytes
255 heads, 63 sectors/track, 5221 cylinders
Units = cylinders of 16065 * 512 = 8225280 bytes

Disk /dev/xvdc doesn't contain a valid partition table

I first tried the rescue command in parted:
parted /dev/xvdc

rescue
       Using /dev/xvdc
Welcome to GNU Parted! Type 'help' to view a list of commands.
(parted) p

Model: Xen Virtual Block Device (xvd)
Disk /dev/xvdc: 42.9GB
Sector size (logical/physical): 512B/512B
Partition Table: loop

Number  Start   End     Size    File system  Flags
 1      0.00kB  42.9GB  42.9GB  ext3

This returned the expected partition - a single ext2/ext3 partition for the entire disk. However a fsck still failed.
Once again there was no obvious reason why this partition should have problems. It hadn't been resized or any other changes. One possbility is that it may have been moved from another storage repository - as opposed to being created and formatting on its current repository.

I then attempted to recover the partition using gpart, which did work.
The full trace of the restore session is below, I had first run it in read mode before specifying write mode (-W <device>)

[root@webtest ~]# gpart -W /dev/xvdc /dev/xvdc

Begin scan...
Possible partition(Linux ext2), size(40954mb), offset(0mb)
End scan.

Checking partitions...
Partition(Linux ext2 filesystem): primary
Ok.

Guessed primary partition table:
Primary partition(1)
   type: 131(0x83)(Linux ext2 filesystem)
   size: 40954mb #s(83875296) s(63-83875358)
   chs:  (0/1/1)-(1023/254/63)d (0/1/1)-(5220/254/57)r

Primary partition(2)
   type: 000(0x00)(unused)
   size: 0mb #s(0) s(0-0)
   chs:  (0/0/0)-(0/0/0)d (0/0/0)-(0/0/0)r

Primary partition(3)
   type: 000(0x00)(unused)
   size: 0mb #s(0) s(0-0)
   chs:  (0/0/0)-(0/0/0)d (0/0/0)-(0/0/0)r

Primary partition(4)
   type: 000(0x00)(unused)
   size: 0mb #s(0) s(0-0)
   chs:  (0/0/0)-(0/0/0)d (0/0/0)-(0/0/0)r

Edit this table (y,n) : y

Edit which partition (1..4, q to quit) : 1

Warning: entered values will not be checked; enter at your own risk!
1 - Absolute start sector (          63)
2 - Absolute sector count (    83875296)
3 - Partition type        (         131)(Linux ext2 filesystem)

Edit which value (1..3, q to quit) : 1
Enter value for 1 : 63

Warning: entered values will not be checked; enter at your own risk!
1 - Absolute start sector (          63)
2 - Absolute sector count (    83875296)
3 - Partition type        (         131)(Linux ext2 filesystem)

Edit which value (1..3, q to quit) : 3
Enter value for 3 : 131

Warning: entered values will not be checked; enter at your own risk!
1 - Absolute start sector (          63)
2 - Absolute sector count (    83875296)
3 - Partition type        (         131)(Linux ext2 filesystem)

Edit which value (1..3, q to quit) : q
Primary partition(1)
   type: 131(0x83)(Linux ext2 filesystem)
   size: 40954mb #s(83875296) s(63-83875358)
   chs:  (0/1/1)-(1023/254/63)d (0/1/1)-(5220/254/57)r

Primary partition(2)
   type: 000(0x00)(unused)
   size: 0mb #s(0) s(0-0)
   chs:  (0/0/0)-(0/0/0)d (0/0/0)-(0/0/0)r

Primary partition(3)
   type: 000(0x00)(unused)
   size: 0mb #s(0) s(0-0)
   chs:  (0/0/0)-(0/0/0)d (0/0/0)-(0/0/0)r

Primary partition(4)
   type: 000(0x00)(unused)
   size: 0mb #s(0) s(0-0)
   chs:  (0/0/0)-(0/0/0)d (0/0/0)-(0/0/0)r

Edit which partition (1..4, q to quit) : q
Activate which partition (1..4, q to quit) : 1
Write this partition table (y,n) : y


After this I was able to check and mount the partition:
[root@webtest ~]# fsck.ext3 /dev/xvdc1
e2fsck 1.39 (29-May-2006)
/dev/xvdc1: clean, 1394/5242880 files, 8291901/10484412 blocks


While this process worked ok there is no substitution for having a complete backup of the system.

Conclusion.

To conclude the process went well and the pool is now in an improved state -with all 3 servers in it.
The exercise was a valuable one in terms of practising a disaster recovery scenario and improving our knowledge and confidence with Xenserver.

I would recommend the procedure - done on a test system -to anyone responsible for managing a virtual server pool.


Other References.

This post Reinstalling Xenserver 6.0/5.6 and Preserving Virtual Machines on the Local Disk, is interesting as it documents a procedure to keep the local storage repositories intact. We didn't follow this procedure as we were not using the local disks, however the material in it is very useful.
The documents: